by Joseph Standley | Oct 12, 2012 | Student Pilots
This is what the S-Turn should look like. Notice how the wind is at the tail when you enter. Many people say it doesn’t matter because it doesn’t say it in the PTS. Entering with a tailwind is the proper way and it does say it in FAA publications. Why does it matter? There are a couple of reasons, one is that this maneuver is helping you with the skills you need for landing setup. When you come into the pattern you enter with a tailwind. The second is explained next.
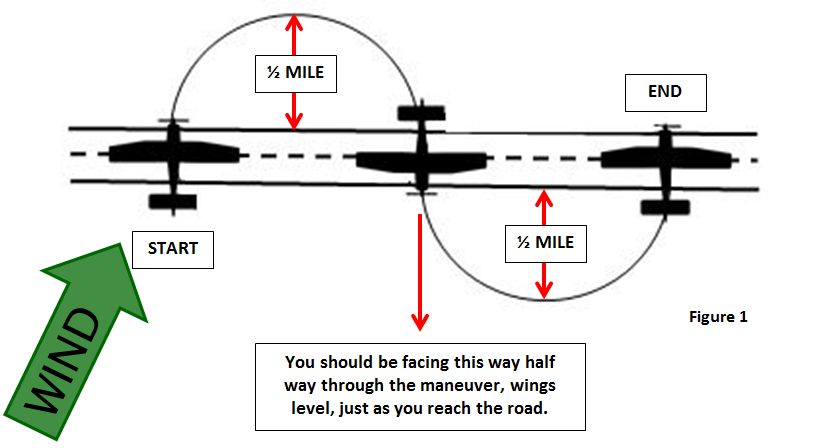
You should enter with a tailwind and this is why; when you do your ground reference maneuvers, you want to plan them to not exceed 45° of bank. The distance from the road should be pretty tight, usually around 1/2 mile or less. Let’s assume that the winds were really strong and you entered the maneuver into the wind.
Turning required very little bank because the wind was pushing you back. By the time you get half way through the turn 1/2 mile from the road, you may only be in a 25° bank turn. As you turn toward the road for the second half of the maneuver, the wind is at your tail pushing you fast. You now begin the second half of the turn attempting to make it match the first half which was 1/2 mile from the road.
This is where the problem comes in. You’ve reached 45° of bank attempting to keep the same distance as the other side but the wind is pushing too hard. You have to exceed 45° of bank or increase the distance from the road. One will give you a bank that is too steep and the other will not give you equal semi circles and you will find out about it only when it’s too late.
If you entered with the tailwind first and attempted the 1/2 mile distance, you would see that holding 1/2 mile wouldn’t be possible with the current wind. You’d stop your bank at 45° and whatever the distance ended up being, you’d easily be able to do the same on the other side of the road because you’d then be going into the wind.
Another tip I have is for judging distance from the road. If you’re having a hard time maintaining equal distance on each side of the road while practicing S-Turns then use the section lines in the fields if you’re from an area that has them! They are nice and straight and easy to see and can help you judge your distance at a glance. Those who are from areas that don’t have them, sorry, you will have to use your best judgement.
Below is another picture from my ground reference maneuvers e-book that I’ve been sitting on for awhile. I haven’t made it available yet so if you guys like it enough I will make it available.
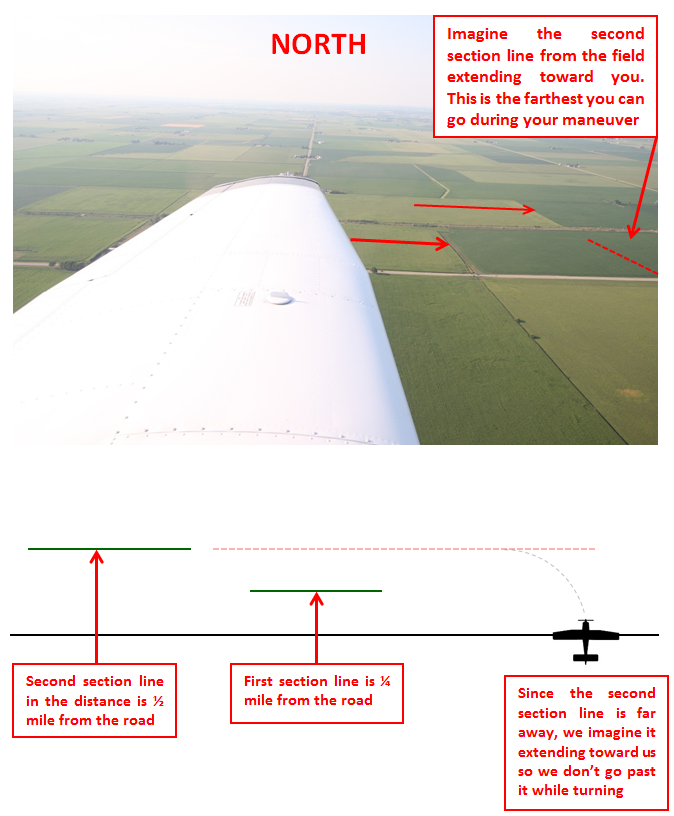
Wings level, over the road at the start of the maneuver we are looking to the left for fields of equal size to judge our distance. Two of them will be about 1/2 mile. As long as you keep an eye on the section lines and make sure you don’t go past the one you choose or turn short of reaching it, then you will equal distances on both sides.
One last tip I have is to choose the highest altitude allowed to do your ground reference maneuvers. In the PTS it says to choose an altitude between 600′-1000′ agl. The latter is more common to what you’d see in a normal traffic pattern which will be more familiar to you and it will also give you more altitude in case of engine problems! I hope you enjoyed this!
by Joseph Standley | Sep 3, 2012 | All Pilots
As a pilot, you have a unique view of the world that many people don’t get to experience in their lives. Those unique views can turn into a deadly MID AIR COLLISION if you’re not careful. Things you see on the ground, such as smoke can distract you. Where there is smoke, there is fire and seeing it from the air would tempt any pilot to check it out.
You have an airplane, and can fly straight to the smoke at over 120mph. No roadblocks or traffic, just a great unobstructed view! I saw this fire on my way back to the airport and had to check it out!
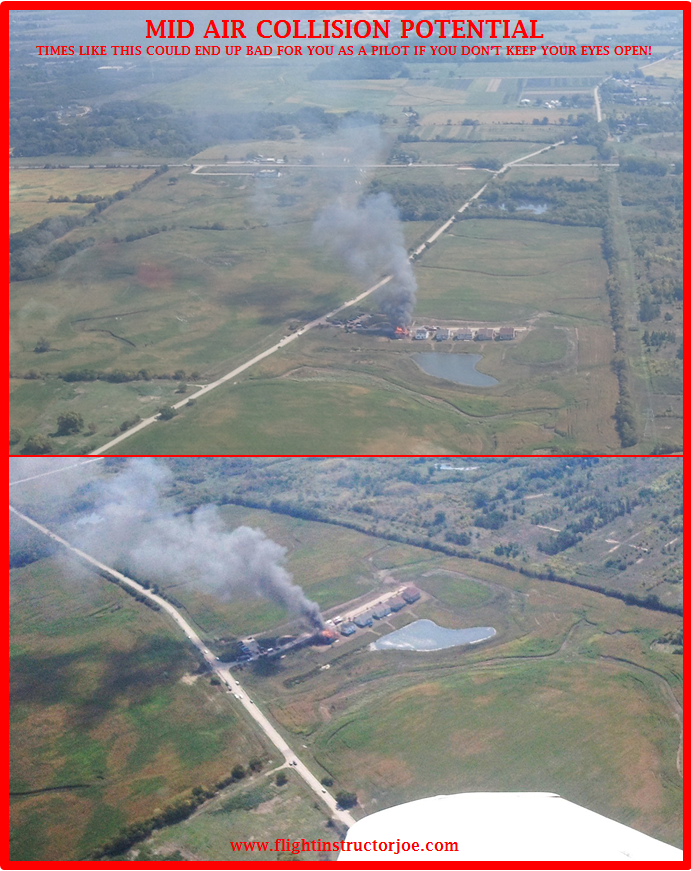
It’s cool to be able to see things like this from the air but they can turn into a mid air collision real fast if you don’t keep your eyes open. Just as it can be tempting for you to fly to the smoke to check it out, other pilots are probably doing the same thing. As I was turning right around this fire, I saw another plane on the opposite side turning left around the fire.
If we were at the same altitude and I hadn’t noticed him, we could have had a mid air collision, causing a couple more fires on the ground for more pilots to look at. Mid air collisions are more likely to happen when there is something to look at on the ground so you have to be extra careful in these areas. If you’re interested in seeing a fire, someone else probably is too. Don’t let distractions on the ground prevent you from doing your job as a pilot which is to protect you and your passengers from harm.
This post is just a reminder to all pilots, that anywhere pilots tend to migrate to is where you have to really keep your scan going. Aiports and the 45° entry into airports are other areas where you should really pay attention. I know it seems like common sense but it’s easier than you think to become distracted, so be careful and avoid a mid air collision by keeping your scan going at all times.
by Joseph Standley | Aug 6, 2012 | Student Pilots
What are S-Turns across a road for?
This article is about how an S-Turn helps you and the common mistakes with S-turns across a road. The purpose of S-Turns and other ground reference maneuvers is to prepare you for landing. During the S-Turn you are at an altitude that is the same as the typical traffic pattern. You are learning about maintaining the proper speed, wind correction and also timing your rollouts to be on a specific heading at the right time. You are developing your hand – eye coordination and learning how much control input is needed and when, to accomplish your goal. When you are making your turns in the pattern and timing your turns to final you are doing the same things you’d be doing during an S-Turn.
In an S-Turn across a road, you are putting in just the right amount of bank to make sure you stay the same distance from the road on both sides. During the beginning, the half way point and end of the maneuver, the plane has to be wings level, with the wings parallel to the road just as it reaches the road. See below for these three positions.
What an S-Turn should look like
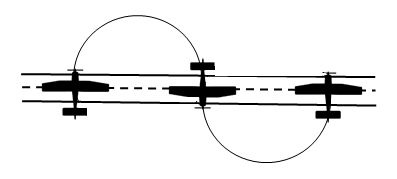
When the plane starts the maneuver it is perfectly lined up with it’s wings level and parallell to the road. At the half way point, it is excatly the same, but heading the opposite direction. The last part will look exactly as it did when you started. The half circles on each side of the road should be the same distance from the road on both sides. Many people struggle with the timing of the roll out as they get to the road. It needs to be timed so that at the exact moment you are reaching the road, you are just finishing leveling off the wings while pointing the exact opposite direction. You need to do a gradual roll into and out of the maneuver. Many people will hold a steep bank all the way to the road and quickly roll wings level as soon as they get to the road. This is not what you want to do. It has to be a gradual roll out timed to be level just as you reach the road. See below for common mistakes.
Common mistakes and reasons for check-ride failure during an S-turn
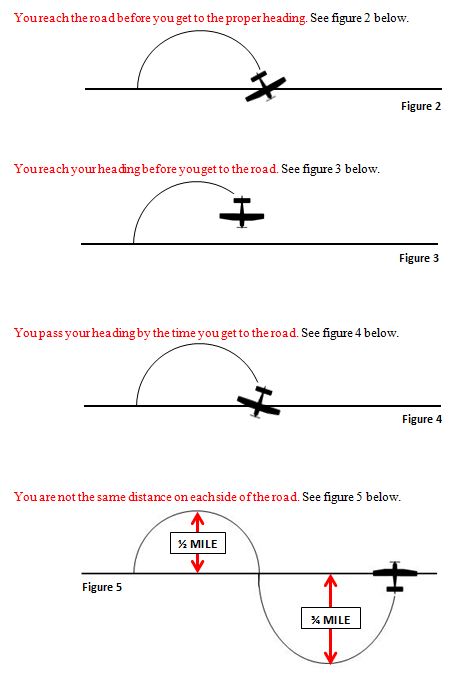
While practicing these maneuvers, try to avoid the above mistakes. Judge your distance accurately and time your roll outs properly while holding altitude and airspeed and you will do perfect S-Turns. Yes, you have to hold altitude and speed too! Have fun and don’t forget to enter the maneuver with a tailwind!
As of the writing of this article, we are just about finished with a couple more E-Lessons; one of which is about ground reference maneuvers. For those who have a hard time understanding where to look and how to judge distance, etc. the lesson will have actual IN FLIGHT photos of the maneuver with detailed instructions along with diagrams like those shown above to show you where you are in the maneuver as it is being done.


